> ## Documentation Index
> Fetch the complete documentation index at: https://sequence-0fb8d9e6-api_docs.mintlify.site/llms.txt
> Use this file to discover all available pages before exploring further.
# How to Deploy in-game Currency in Sequence Builder
> Learn how to create your own in-game currency by deploying and minting from an ERC20 contract. Understand the difference between fungible and non-fungible tokens.
## Introduction
In this guide, we'll walk you through the process of creating your own in-game currency through deploying and minting from an ERC20 contract.
Currency tokens add new and interesting dimensions to in-game economies, transactions, and player interactions to unlock and distribute value.
#### What is an ERC20 token?
An ERC20 token is a digital coin - what makes it special is that it follows a [set of rules called ERC20](https://ethereum.org/en/developers/docs/standards/tokens/erc-20/), making it easy to use in different places on the internet. These tokens often represent value or be used for specific purposes. Unlike the other common token - NFT's, these tokens are fungible.
#### Fungibility vs Non-Fungibility
This is the key distinction to understand.
Fungible tokens (like ERC20 tokens) are interchangeable, and each unit is the same as every other unit, just like dollars or euros. They can easily be split or combined into different quantities.
Non-fungible tokens (like ERC721 tokens) represent unique items with individual properties, such as digital art or collectibles. Each token is distinct and not directly exchangeable with another on a like-for-like basis.
Prerequisite: Create a Project
This guide assumes that you have already [signed up for Builder and created a Project](/solutions/builder/getting-started).
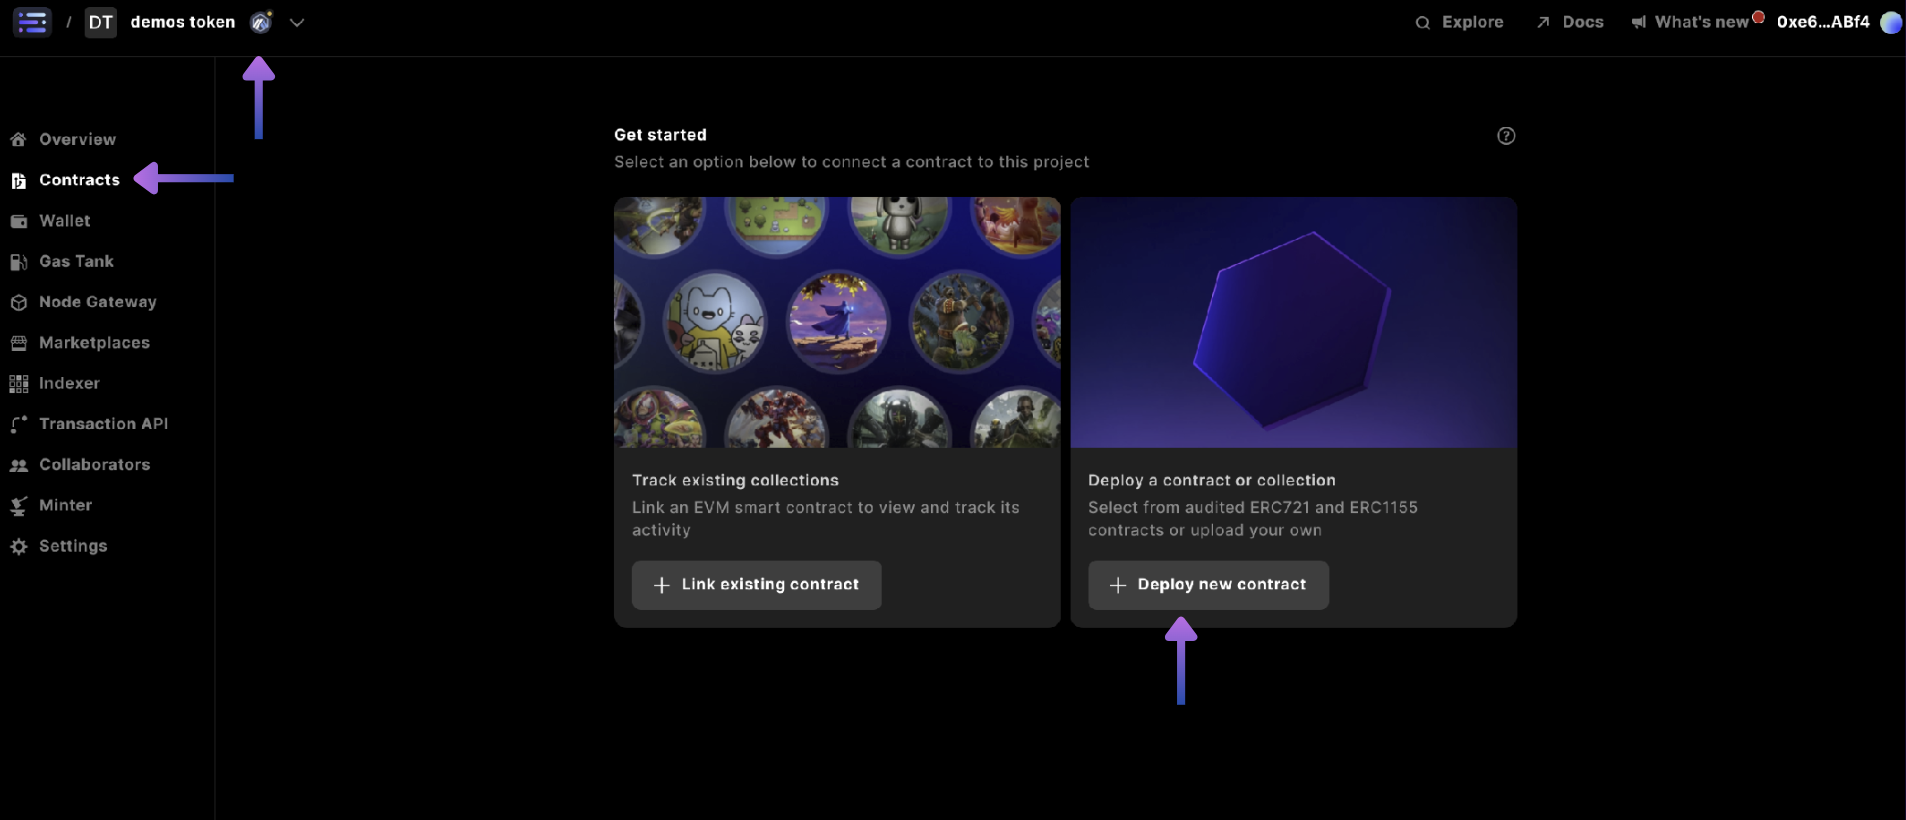
## Step 1: Navigate to contracts
Start by selecting your `project` in the top left and corner for what you want to create the currency for, and head to the `contracts` section and select `+ Deploy new contract`
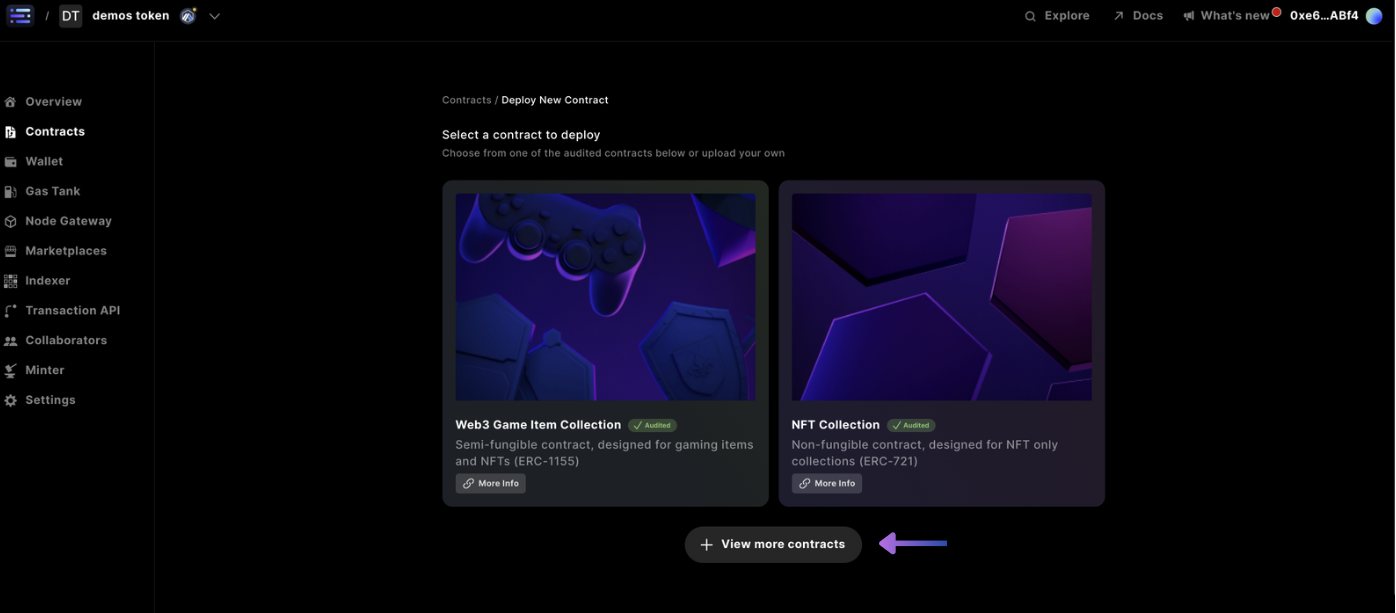
 ## Step 2: Select Currency Token
Click `View more contracts`
## Step 2: Select Currency Token
Click `View more contracts`
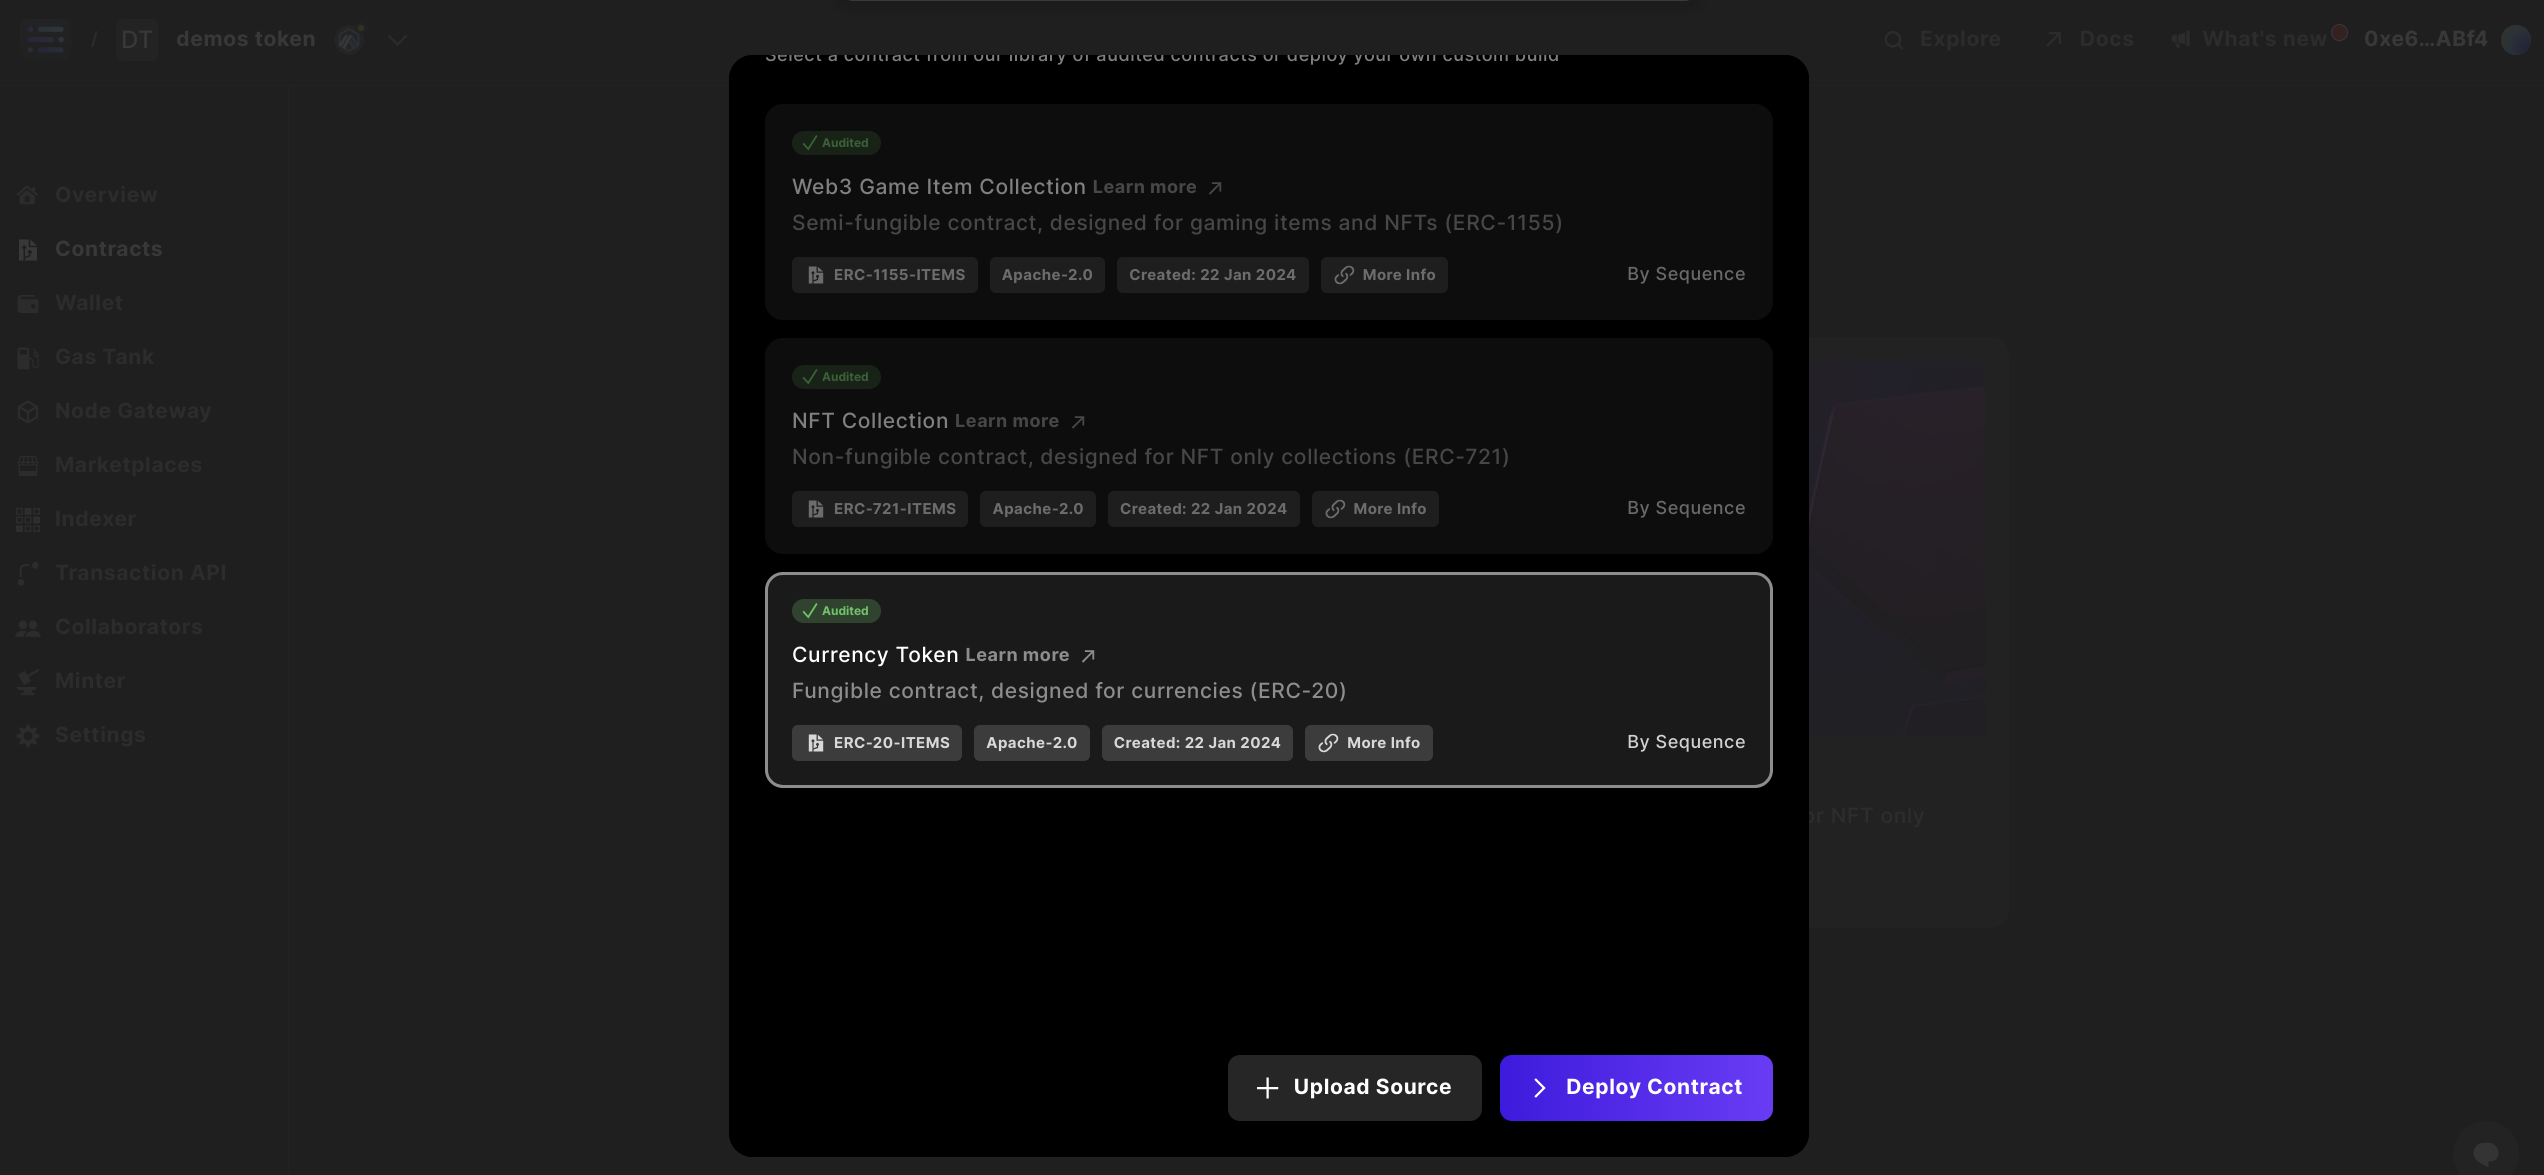
 Select the Currency Token contract and click `deploy` to deploy your Sequence audited contract
 ## Step 3: Specify contract details
Complete the contract details by specifying a `name` and `symbol` for your contract.
## Step 3: Specify contract details
Complete the contract details by specifying a `name` and `symbol` for your contract.
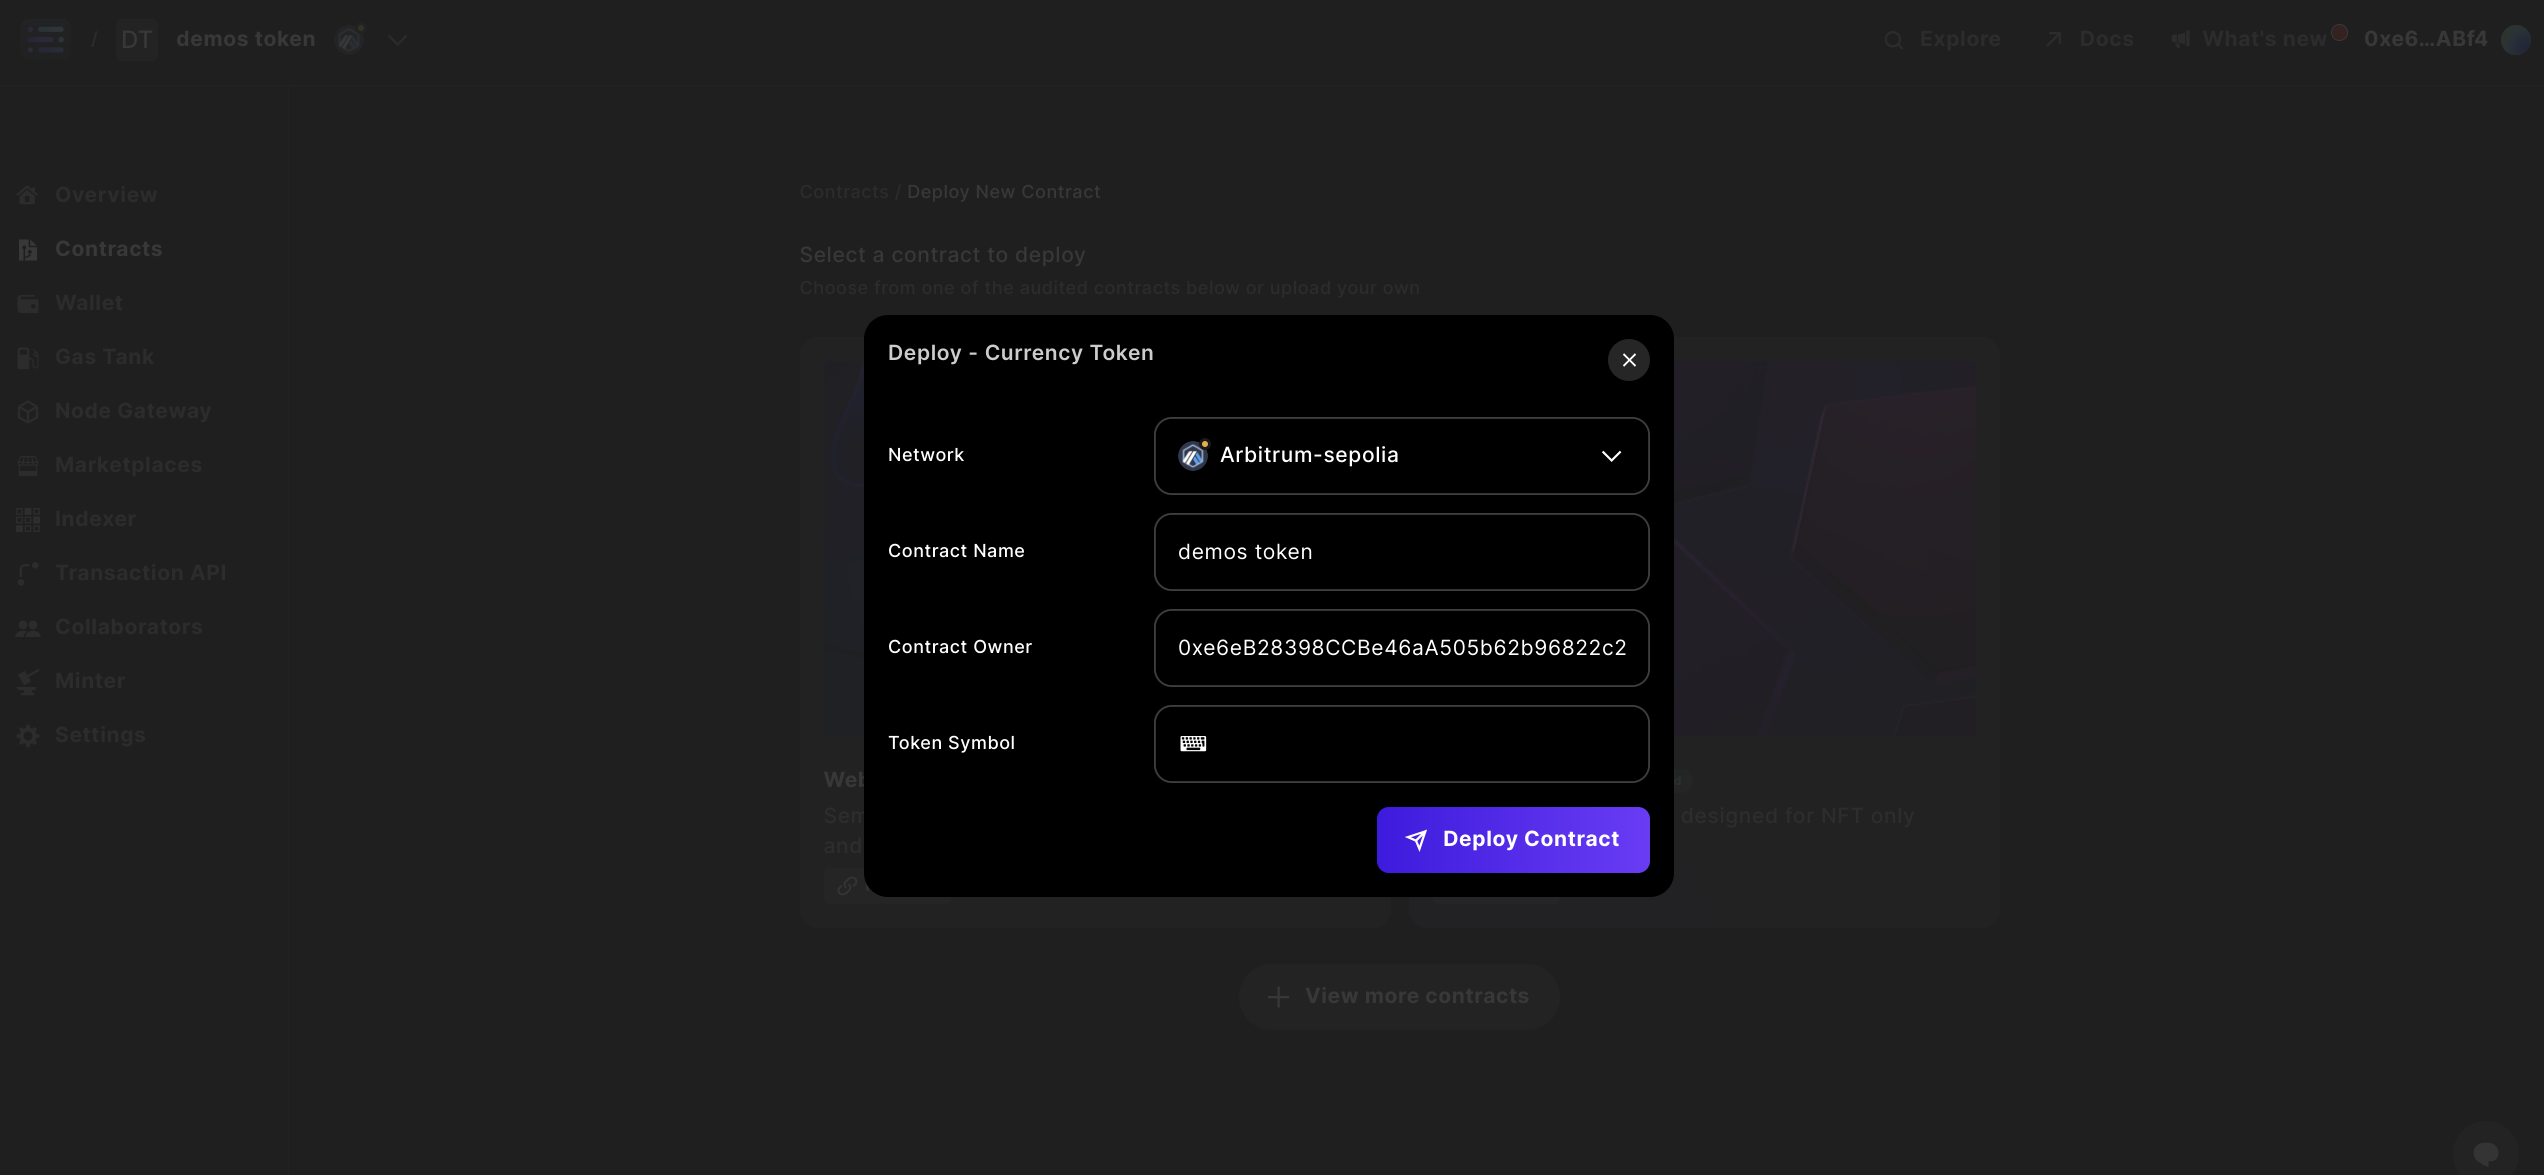 Note:
While you can change the `name` and `symbol` later in the builder interface where it will update across the sequence stack, popular explorers do not reindex the information, so what you put first remains
## Step 4: Deploy your contract
Deploy your contract from the popup window at [http://sequence.app/sign-transaction](http://sequence.app/sign-transaction), and sign the message by selecting `confirm`
Note:
While you can change the `name` and `symbol` later in the builder interface where it will update across the sequence stack, popular explorers do not reindex the information, so what you put first remains
## Step 4: Deploy your contract
Deploy your contract from the popup window at [http://sequence.app/sign-transaction](http://sequence.app/sign-transaction), and sign the message by selecting `confirm`
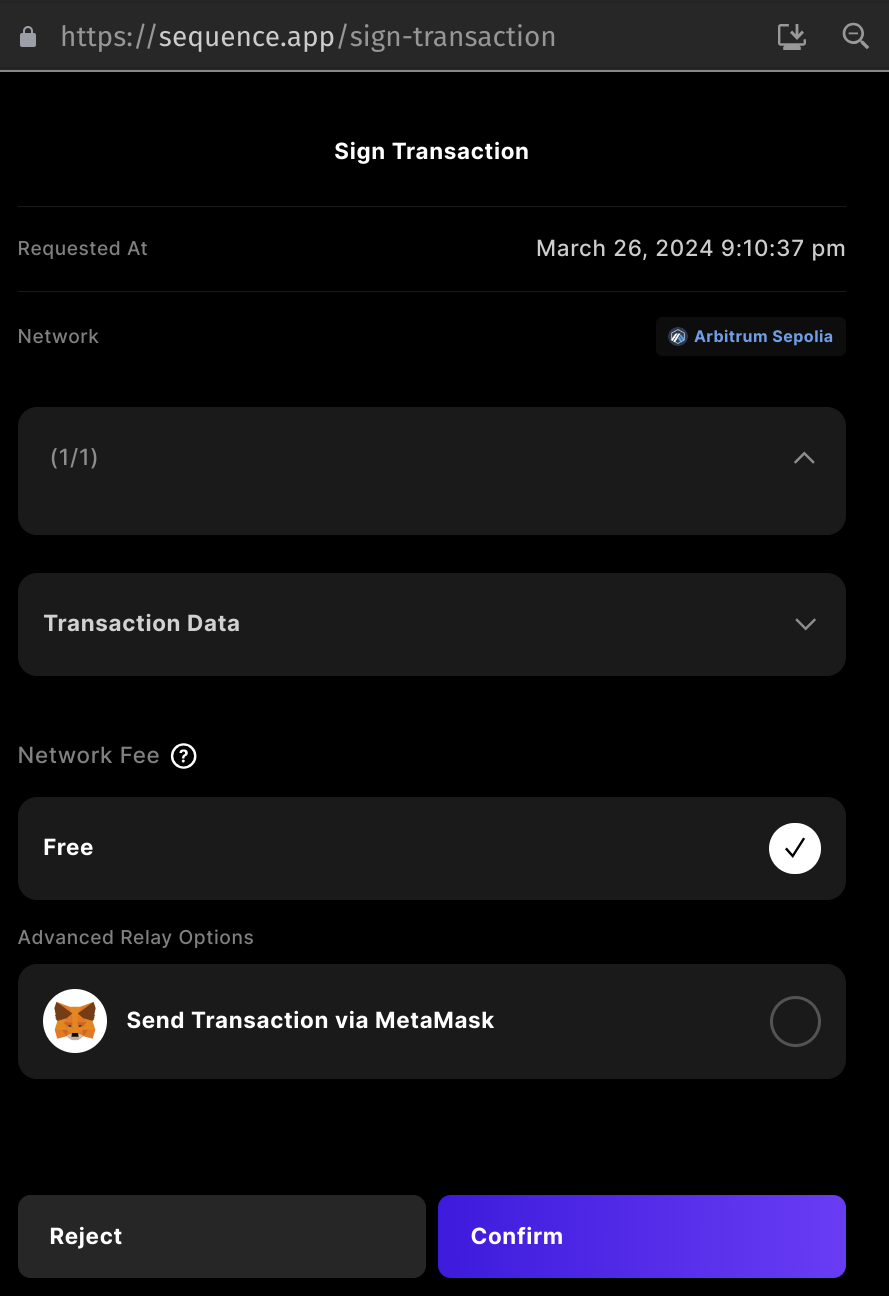 All testnets will be free to transact on
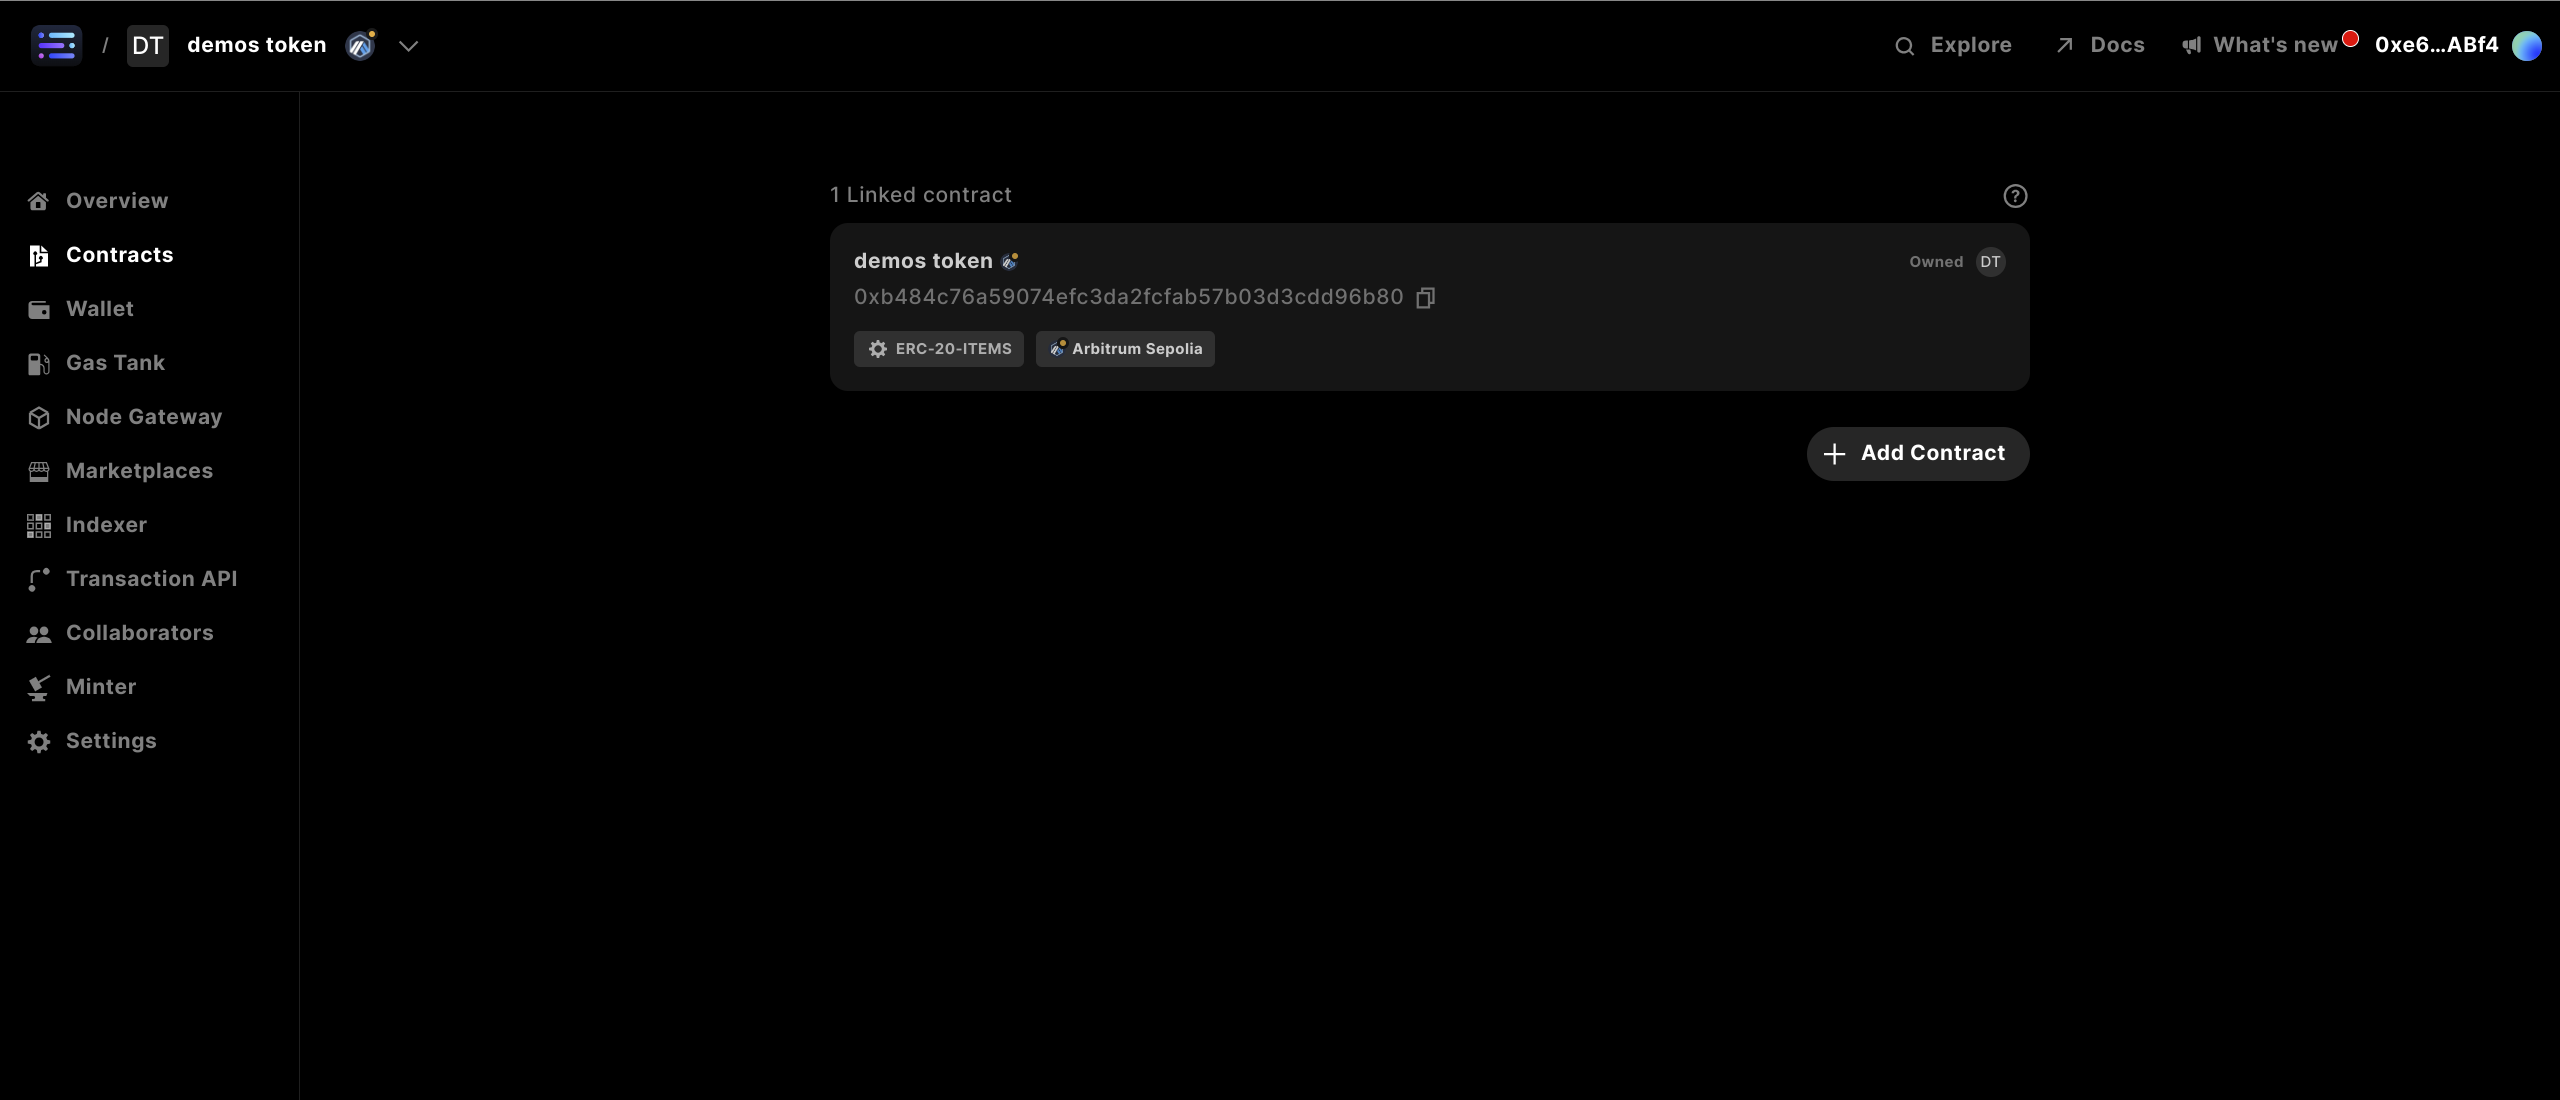
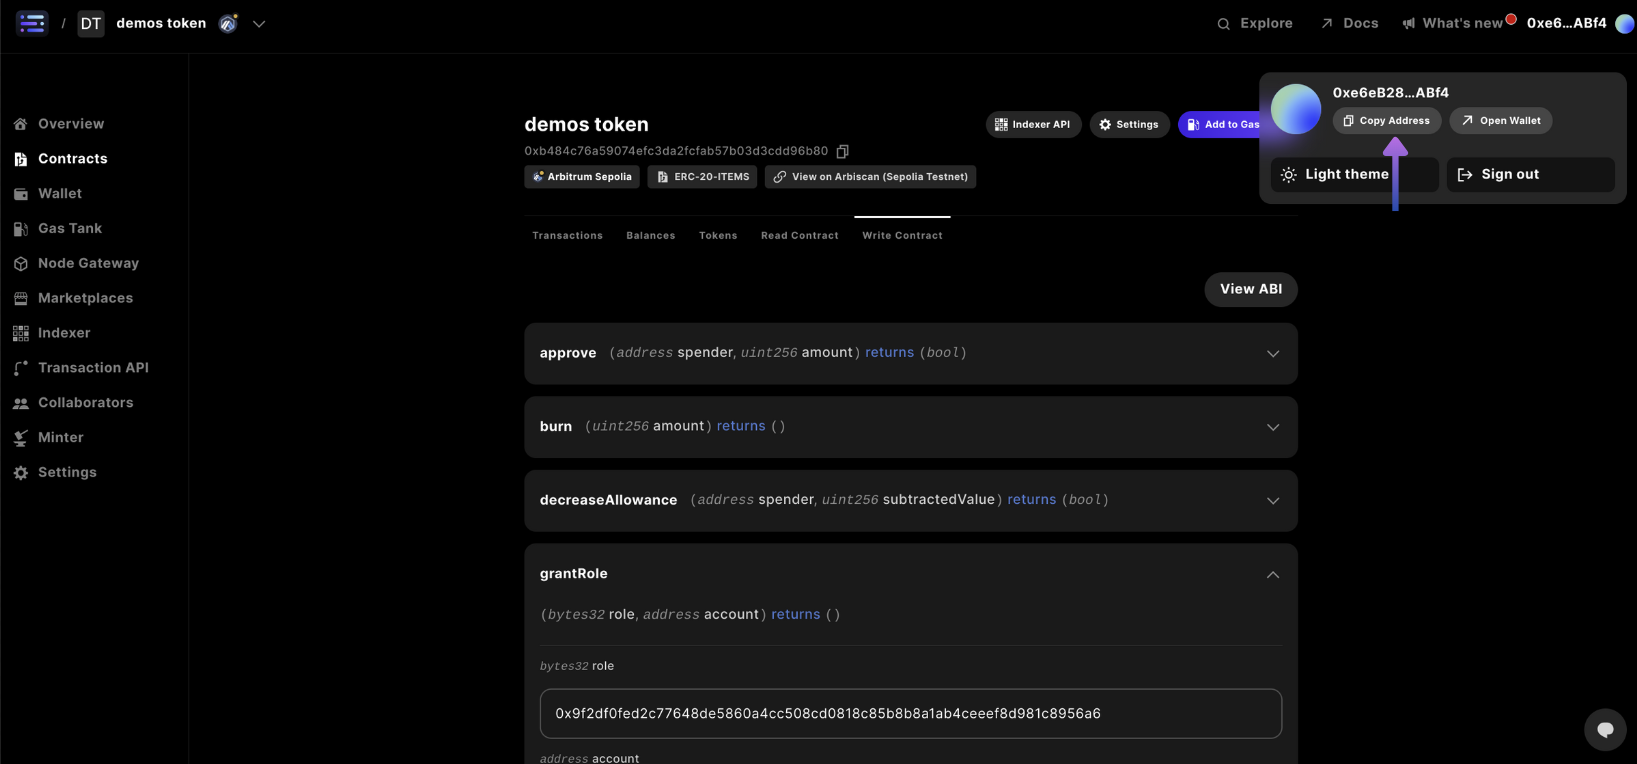
## Step 5: Add a Minter Role to the contract
First start by selecting your contract you just deployed in the `contracts` section
All testnets will be free to transact on
## Step 5: Add a Minter Role to the contract
First start by selecting your contract you just deployed in the `contracts` section
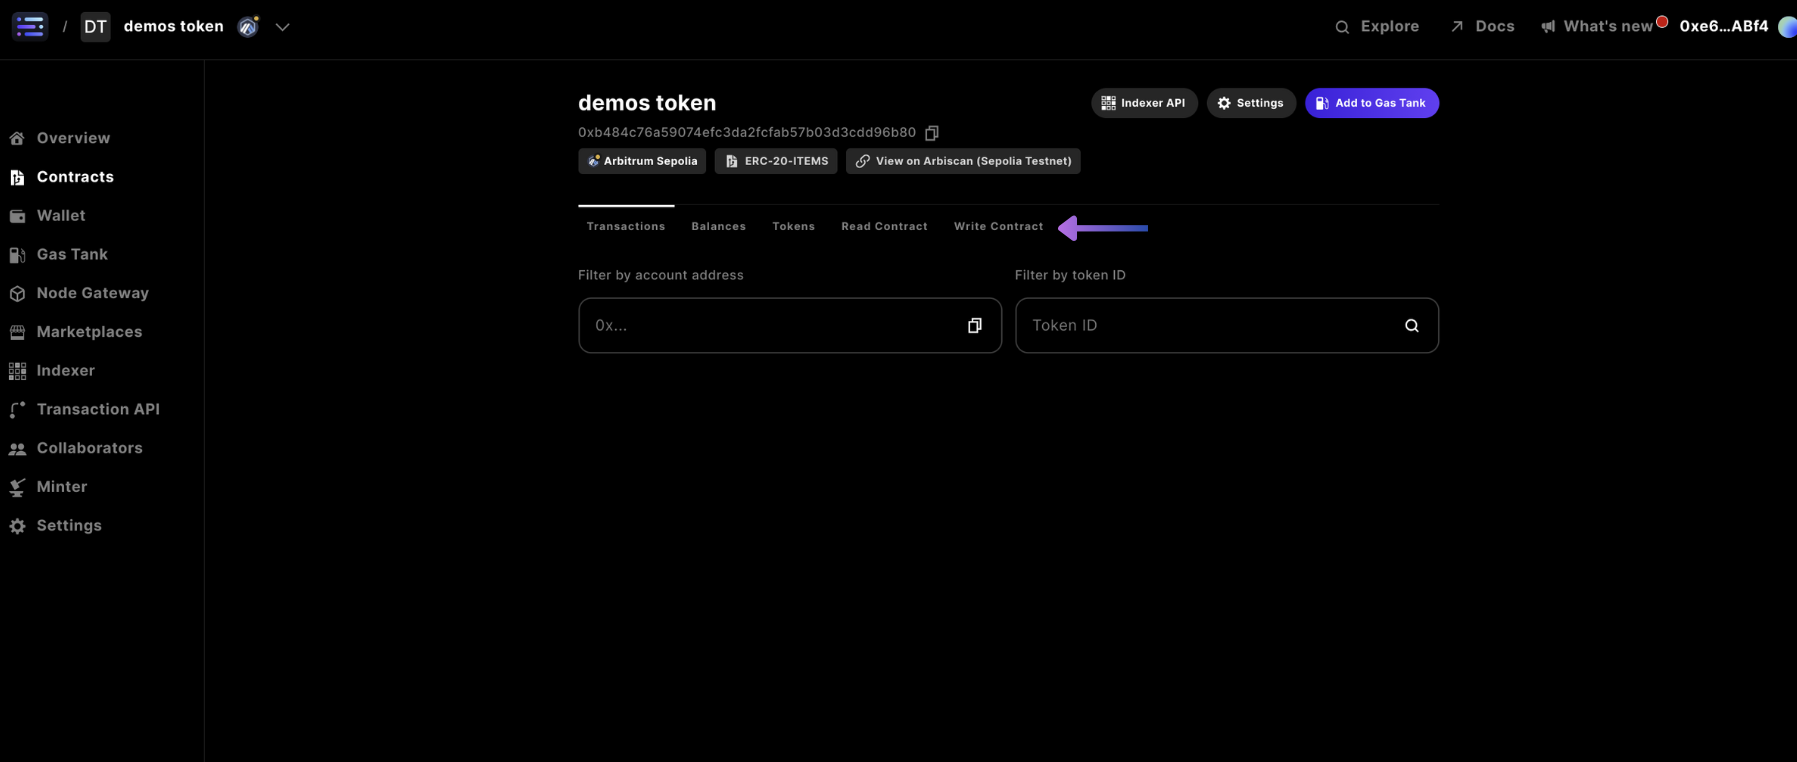
 Next, head to the `Write Contract` section
 In the `grantRole` section of the write contract tab navigation, complete with the following details:
`bytes32 role`: `0x9f2df0fed2c77648de5860a4cc508cd0818c85b8b8a1ab4ceeef8d981c8956a6`
`address account`: ``
Where the wallet address is just copied from the top right hand corner to be able to send tokens to your wallet
In the `grantRole` section of the write contract tab navigation, complete with the following details:
`bytes32 role`: `0x9f2df0fed2c77648de5860a4cc508cd0818c85b8b8a1ab4ceeef8d981c8956a6`
`address account`: ``
Where the wallet address is just copied from the top right hand corner to be able to send tokens to your wallet
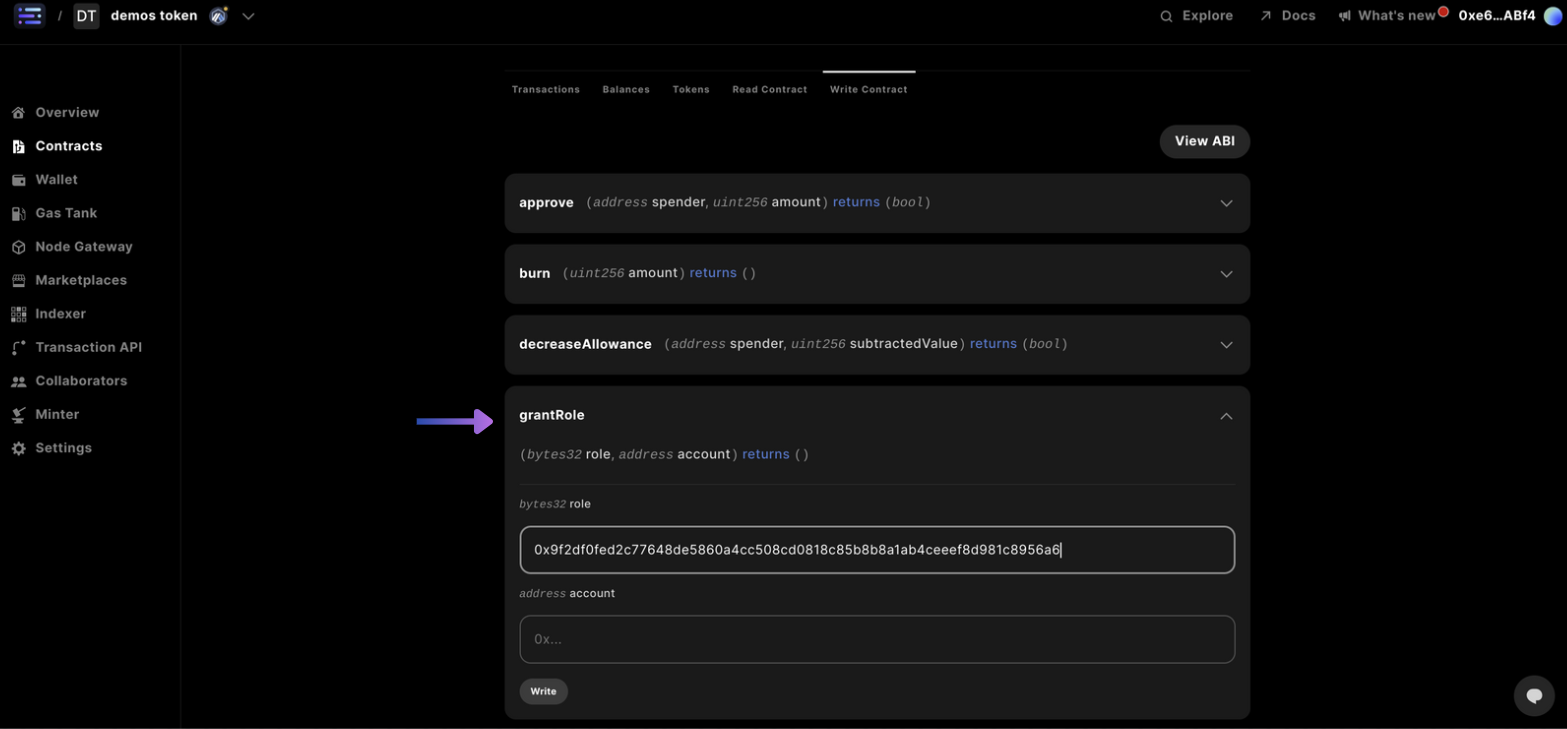 Complete by selecting `write` and signing the transaction in the popup window, like before
With a confirmation message showing `Response Success`
The role string inputted is the result of `solidityPackedKeccak256("MINTER_ROLE")` in
solidity or `ethers.solidityPackedKeccak256(ethers.toUtf8Bytes("MINTER_ROLE"))`
in javascript
It's a typical pattern to use offchain compute like a cloudflare worker with a relayer wallet sending transactions, which would be inputted in the account field, more on how to accomplish this [here](/guides/mint-collectibles-serverless#mint-collectibles-using-a-gasless-serverless-transactions-api)
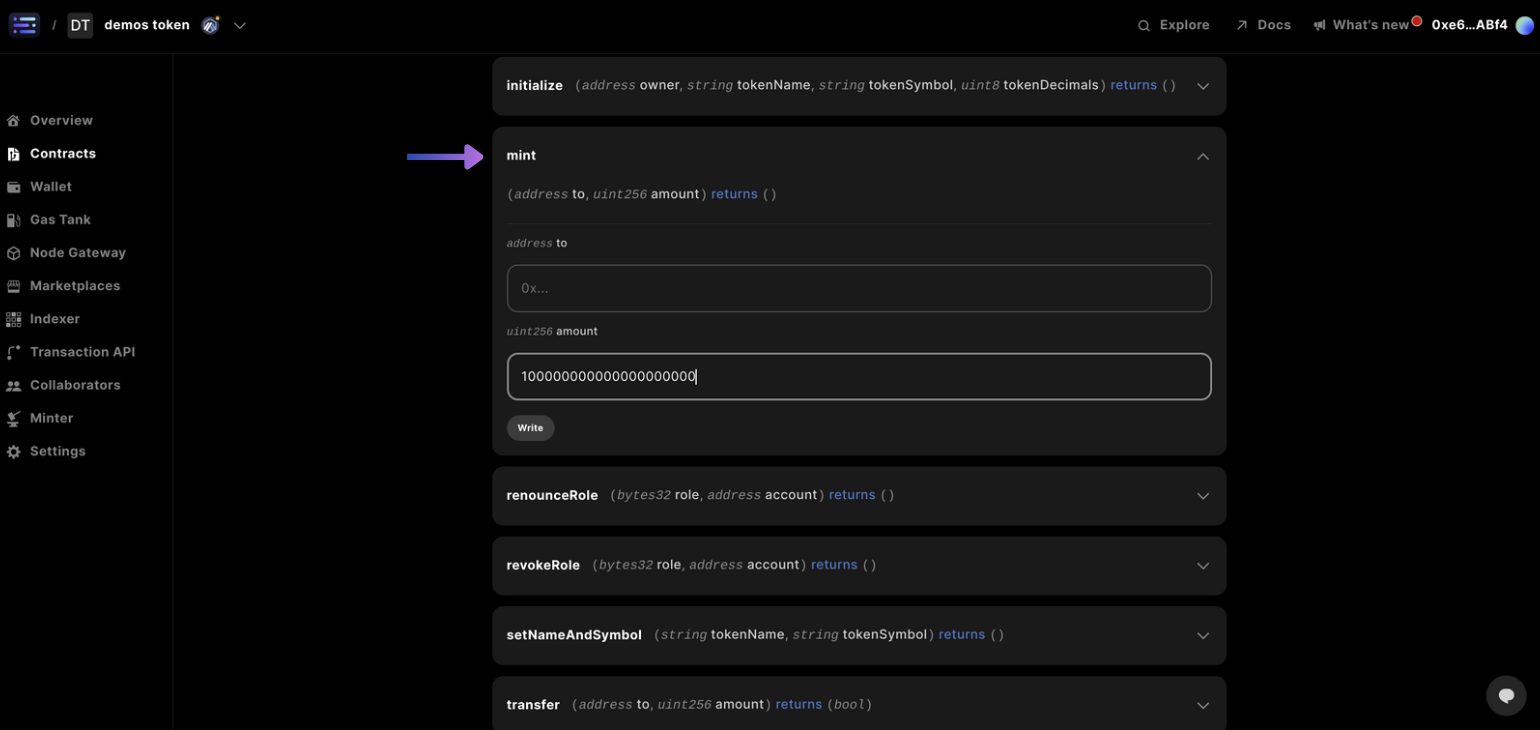
## Step 6: Mint tokens to your wallet address
Navigate to the `mint` card in the `Write Contract` section and input your wallet address that you would like to receive tokens to and amount of tokens in 18 decimals. So for 100 tokens you would input: `100000000000000000000`
Complete by selecting `write` and signing the transaction in the popup window, like before
With a confirmation message showing `Response Success`
The role string inputted is the result of `solidityPackedKeccak256("MINTER_ROLE")` in
solidity or `ethers.solidityPackedKeccak256(ethers.toUtf8Bytes("MINTER_ROLE"))`
in javascript
It's a typical pattern to use offchain compute like a cloudflare worker with a relayer wallet sending transactions, which would be inputted in the account field, more on how to accomplish this [here](/guides/mint-collectibles-serverless#mint-collectibles-using-a-gasless-serverless-transactions-api)
## Step 6: Mint tokens to your wallet address
Navigate to the `mint` card in the `Write Contract` section and input your wallet address that you would like to receive tokens to and amount of tokens in 18 decimals. So for 100 tokens you would input: `100000000000000000000`
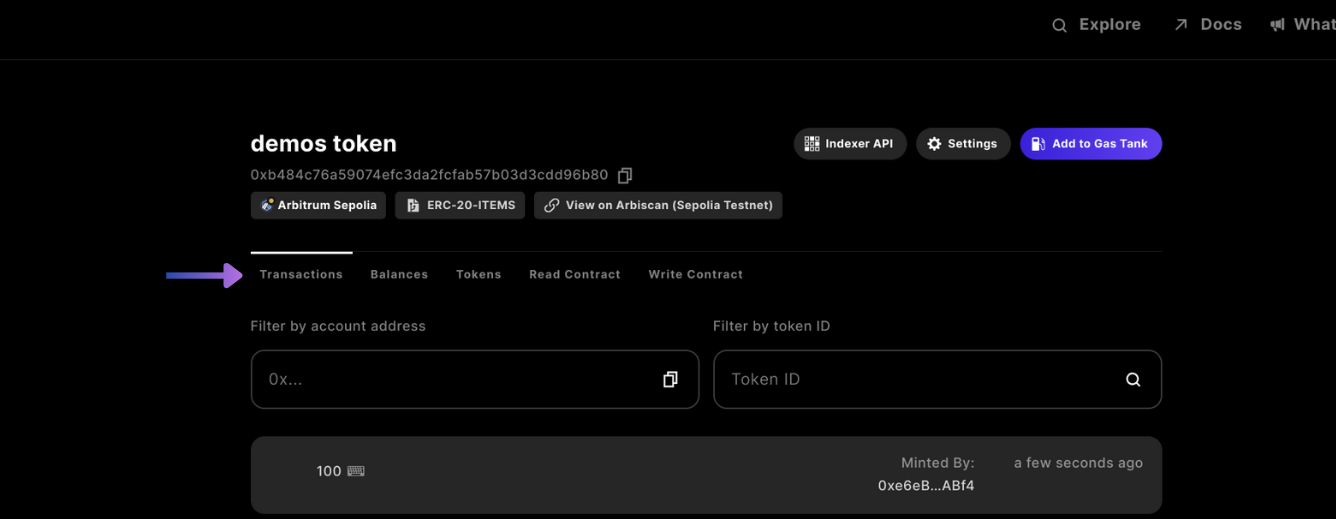
 ## Step 7: Confirm your minted currency
And you're done!
You can view the transactions submitted to the blockchain for your wallet address in the `Transactions` tab navigation
## Step 7: Confirm your minted currency
And you're done!
You can view the transactions submitted to the blockchain for your wallet address in the `Transactions` tab navigation